Contents...
FastCGI work as a middle ground between the PHP Apache module and the CGI application. When PHP scripts executed with FastCGI each request is passed from the web server to FastCGI via a communication socket. It Allows for much greater scalability as the web server and the PHP interpreter can be split into their own individual server environments if necessary. However a similar end result can also be achieved using nginx in front of Apache (such that nginx handles basic requests itself and only passes dynamic requests to Apache).
In this tutorial I will show how you can install Apache with PHP-FPM/FastCGI on Ubuntu system.
Apache Installation
First of all install the latest Apache on your system. Follow the bellow command to install latest Apache.
$ sudo apt update
$ sudo apt install apache2 libapache2-mod-fastcgi
PHP Installation
Now install the latest PHP, For the installation of PHP versions, we use the PPA maintained here. Use the below couple of commands to add the PPA to your system.
$ sudo apt install python-software-properties
$ sudo add-apt-repository ppa:ondrej/php
Simply run the follows commands for the installation of PHP and PHP-FPM packages.
$ apt update
$ sudo apt install php7.2 php7.2-fpm
After installing above packages php7.2-fpm service will automatically be started. You can make sure by typing below command on terminal.
$ sudo systemctl status php7.2-fpm

● php7.2-fpm.service - The PHP 7.2 FastCGI Process Manager
   Loaded: loaded (/lib/systemd/system/php7.2-fpm.service; enabled; vendor preset: enabl
   Active: active (running) since Wed 2018-01-21 10:13:28 UTC; 17s ago
     Docs: man:php-fpm7.2(8)
 Main PID: 27506 (php-fpm7.2)
   Status: "Processes active: 0, idle: 2, Requests: 0, slow: 0, Traffic: 0req/sec"
   CGroup: /system.slice/php7.2-fpm.service
           ├─27506 php-fpm: master process (/etc/php/7.2/fpm/php-fpm.conf)
           ├─27509 php-fpm: pool www
           └─27510 php-fpm: pool www

Jan 21 10:13:28 looklinux systemd[1]: Starting The PHP 7.2 FastCGI Process Manager...
Jan 21 10:13:28 looklinux systemd[1]: Started The PHP 7.2 FastCGI Process Manager.
Configure Apache
You can enable few modules required for the configuration of multiple PHP version with Apache. All these modules are required to integrate PHP-FPM and FastCGI with Apache web server.
$ a2enmod actions fastcgi alias proxy_fcgi
Now configure the Apache VirtualHost to run with FPM/FastCGI. In this tutorial , we use default VirtualHost. Edit VirtualHost host configuration file in text editor. You can create new VirtualHost as per your requirements, so make sure to enable any new VirtualHost.
$ sudo vim /etc/apache2/sites-available/000-default.conf


    ServerName looklinux.com
    ServerAlias www.looklinux.com
    DocumentRoot /var/www/html


        Options -Indexes +FollowSymLinks +MultiViews
        AllowOverride All
        Require all granted


        # 2.4.10+ can proxy to unix socket
        SetHandler "proxy:unix:/var/run/php/php5.6-fpm.sock|fcgi://localhost/"

        # Else we can just use a tcp socket:
        #SetHandler "proxy:fcgi://127.0.0.1:9000"


    ErrorLog ${APACHE_LOG_DIR}/error.log
    CustomLog ${APACHE_LOG_DIR}/access.log combined
Save and close file and restart Apache to reload the changes.
$ sudo systemctl restart apache2
Testing
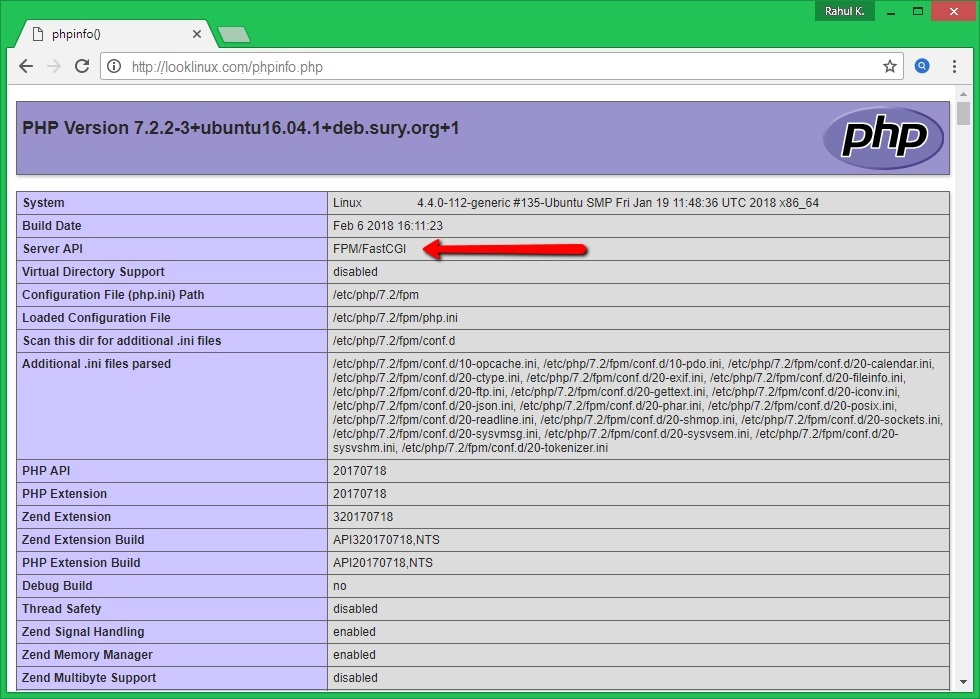
For testing now create a PHP script with phpinfo() function and place it to your web server document root directory.
$ echo "" > /var/www/html/phpinfo.php
Now open your web browser to access the phpinfo.php script using server IP address (for default VirtualHost) for your configured domain in Apache VirtualHost.
If you find this tutorial helpful please share with your friends to keep it alive. For more helpful topic browse my website www.looklinux.com. To become an author at LookLinux Submit Article. Stay connected to Facebook.
Leave a Comment