Contents...
In this article I will show how you can install Joomla CMS on your Debian based systems.
Follow the below steps to install Joomla CMS on the Debian based systems.
Step #1 : Setup LAMP Stack
First of all, you have to setup LAMP stack on your system. Follow the below command to install LAMP stack on your server to do this you have to install PPA Repository in your system.
$ sudo apt-get install -y python-software-properties
$ sudo add-apt-repository ppa:ondrej/php -y
Next install the required packages for LAMP Stack such Linux, Apache, MySQL and PHP using below commands.
$ sudo apt-get install apache2 apache2-data apache2-utils
$ sudo apt-get install php php-mcrypt php-curl php-mysql php-gd php-cli php-json php-xml php-zip libapache2-mod-php
$ sudo apt-get install mysql-server mysql-client
Step #2 : Download Latest Joomla CMS Stable Version
Now download the latest Joomla CMS stable version from here.
$ cd /tmp/
$ wget  https://github.com/joomla/joomla-cms/releases/download/3.8.2/Joomla_3.8.2-Stable-Full_Package.tar.gz
After downloading Joomla packages now extract it under your web document root directory in my case it is /var/www/html/joomla.
$ mkdir -p /var/www/html/joomla
$ cd /var/www/html/joomla
$ tar xzf Joomla_3.8.2-Stable-Full_Package.tar.gz
$ chown -R apache:apache
$ chmod -R 755 /var/www/html/joomla
Step #3 : Setup Apache VirtualHost For Joomla
To access your Joomla directory you will setup Apache virtualhost like below.
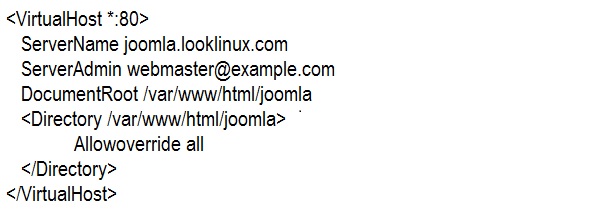
Please change the ServerName as per your requirement.
Step #4 : Setup MySQL Database
Now you have to create MySQL database, user for joomla to do this you need to access your database server using root privileges. Follow the below MySQL command to do this.
mysql> CREATE DATABASE joomla;
mysql> GRANT ALL on joomla.* to joomla@localhost IDENTIFIED by "joomla@321";
mysql> FLUSH PRIVILEGES;
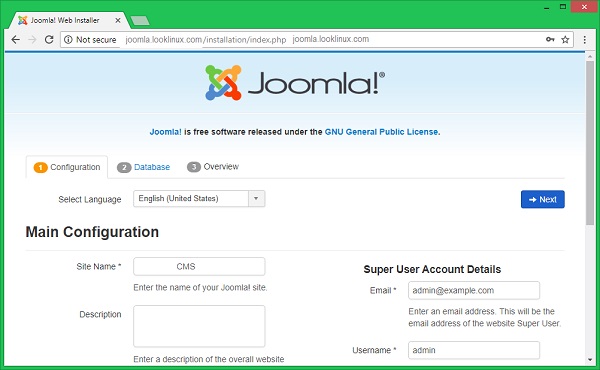
Step #5 : Access Joomla Web Installation Page
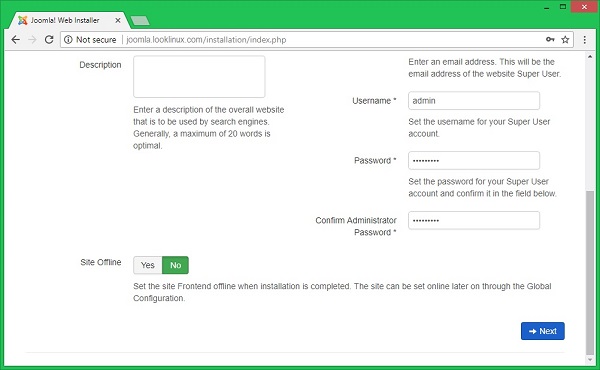
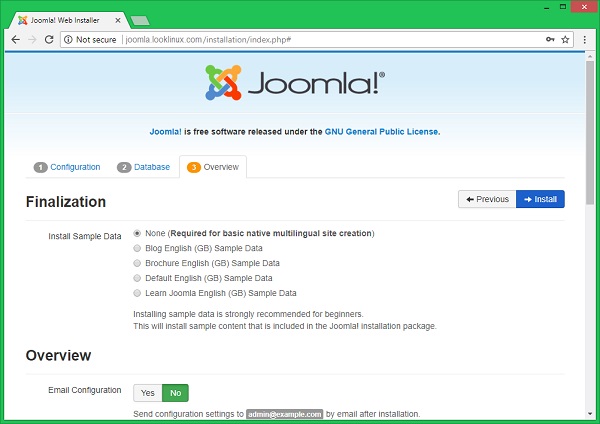
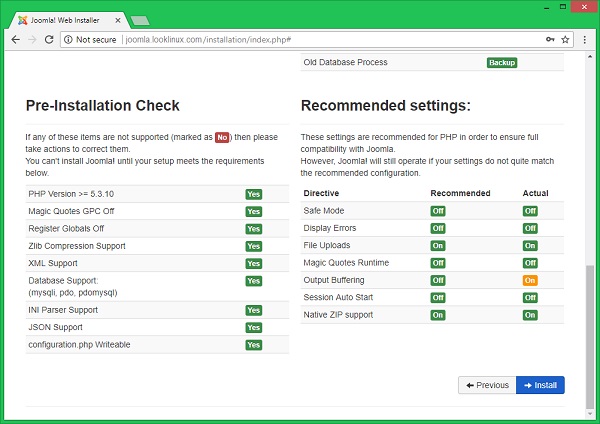
Follow the below URL to access the Joomla web installation page. At this page enter your site name and admin user details to access Joomla admin panel after installation completed.
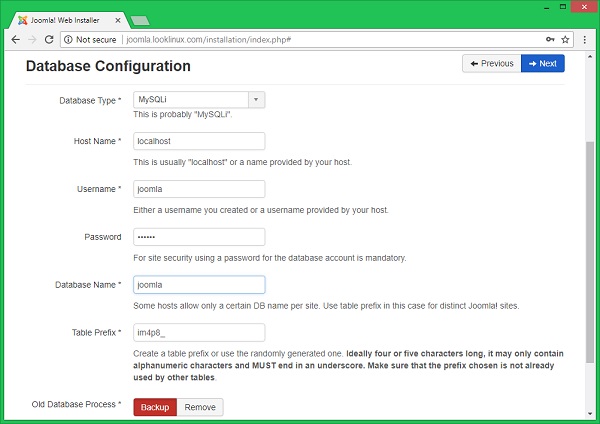
Enter the database details on this page you create before in step 4.
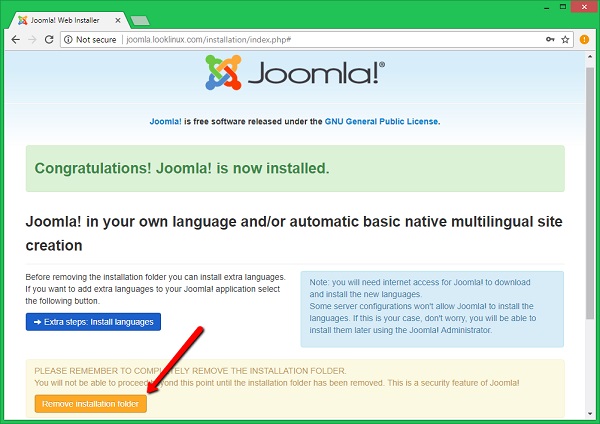
Joomla successfully has been installed on your system, now you have to just remove the installation directory by clicking on “Remove Installation Folder” button as shown below.
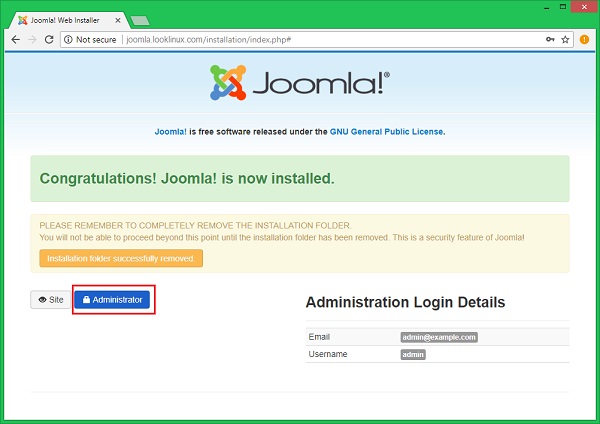
Now click on “Administrator” it will redirect you to Joomla admin panel.

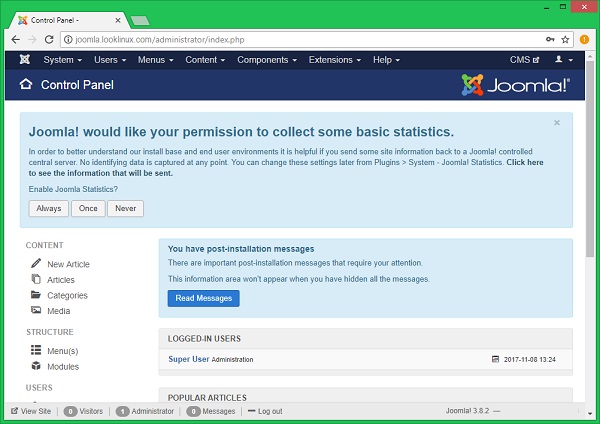
Now enter your admin details to login. After successful login you will get Administrator Joomla Dashboard.
If you find this tutorial helpful please share with your friends to keep it alive. For more helpful topic browse my website www.looklinux.com. To become an author at LookLinux Submit Article. Stay connected to Facebook.
Leave a Comment