PhpBB is among the most popular internet forum systems. It is written in PHP scripting language. It allows creation of categories, allow permissions to open unlimited forums and groups and lets them add features like smileys, word sensors, polls and mass mailing.
It has a huge variety of features like flat topic structure, sub-forums, forum-specific styles, user groups, group-based permissions, database query and template caching, support for PHP 7, multiple database engines and much more
In this article I will show you how to install phpBB on Ubuntu sytem.
Prerequisites
- LAMP ( Apache, MariaDB, PHP7) Stack should be installed on the system.
- Create a database and user with sufficient privileges to user.
- PHP Modules : php7.0-mysql php7.0-curl php7.0-json php7.0-cgi php7.0 libapache2-mod-php7.0 php7.0-mcrypt php7.0-xmlrpc php7.0-gd
phpBB Installation
Install required php modules using below command :
# apt-get install php7.0-mysql php7.0-curl php7.0-json php7.0-cgi php7.0 libapache2-mod-php7.0 php7.0-mcrypt php7.0-xmlrpc php7.0-gd
Download phpBB packages using wget command.
# wget https://www.phpbb.com/files/release/phpBB-3.2.1.zip
--2017-11-09 11:48:25--  https://www.phpbb.com/files/release/phpBB-3.2.1.zip
Resolving www.phpbb.com (www.phpbb.com)... 140.211.15.244
Connecting to www.phpbb.com (www.phpbb.com)|140.211.15.244|:443... connected.
HTTP request sent, awaiting response... 200 OK
Length: 7767156 (7.4M) [application/zip]
Saving to: ‘phpBB-3.2.1.zip’

phpBB-3.2.1.zip     100%[===================>]   7.41M   113KB/s    in 34s

2017-11-09 11:49:07 (221 KB/s) - ‘phpBB-3.2.1.zip’ saved [7767156/7767156]
After downloaded package now extract it into your web document root directory using unzip command.
# unzip phpBB-3.2.1.zip –d /var/www/html
Archive:  phpBB-3.2.1.zip
   creating: phpBB3/
   creating: phpBB3/language/
   creating: phpBB3/language/en/
  inflating: phpBB3/language/en/viewforum.php
  inflating: phpBB3/language/en/memberlist.php
  inflating: phpBB3/language/en/install.php
  inflating: phpBB3/language/en/posting.php
  inflating: phpBB3/language/en/captcha_recaptcha.php
  inflating: phpBB3/language/en/viewtopic.php
inflating: /var/www/html/phpBB3/images/upload_icons/zip.gif
  inflating: /var/www/html/phpBB3/images/upload_icons/mid.gif
  inflating: /var/www/html/phpBB3/images/index.htm
  inflating: /var/www/html/phpBB3/images/spacer.gif
..........
........
Go to your web root directory and change the ownership and permission of file and directory.
# chown www-data:www-data -R /var/www/html/
# chmod 775 -R /var/www/html/
Now enable module rewrite on the web server.
# a2enmod rewrite
Create Apache virtual host file called “phpbb.conf” and add the below content into your file.
# vim /etc/apache2/sites-available/phpbb.conf
ServerAdmin [email protected]
DocumentRoot /var/www/html/phpBB3/
ServerName phpbb.com
ServerAlias www.phpbb.com

Options FollowSymLinks
AllowOverride All
Order allow,deny
allow from all

ErrorLog /var/log/apache2/phpbb.com-error_log
CustomLog /var/log/apache2/phpbb.com-access_log common
Save and close file.
Edit the local hosts file and add the below line.
# vim /etc/hosts
192.168.0.5	  gogs.com   # My local machine IP and domain name
Save and close file. Now go to the gogs directory.
Now enable Apache virtual host file using below command.
# a2ensite phpbb.conf
Enabling site phpbb. To activate the new configuration, you need to run:
#service apache2 reload
Restart Apache service.
# /etc/init.d/apache2 restart
Go to your web browser and enter the below URL.
http://phpbb.com/install
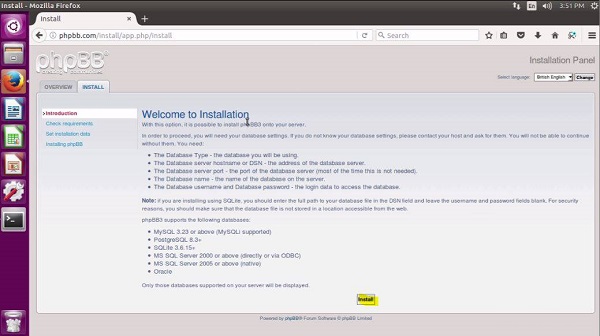
Next screen will display installation process of phpBB. Click on Install button to start installation process.
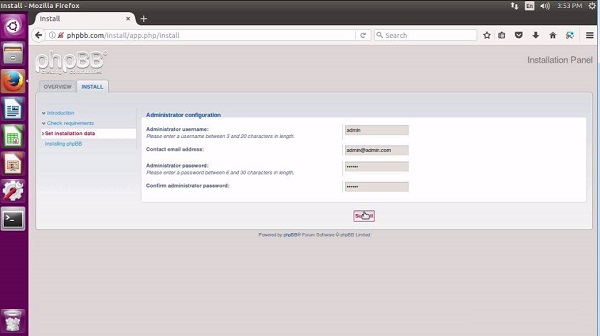
Fill the admin details and click on Submit button.
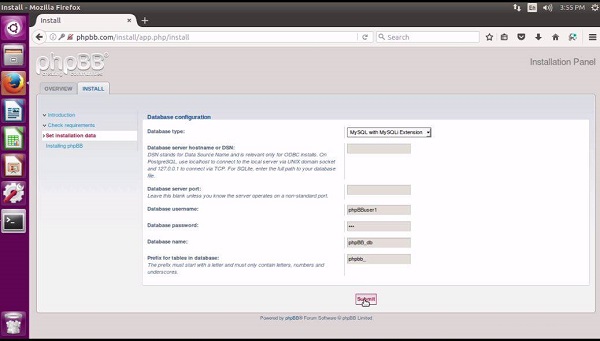
Fill the required database details and click on Submit button.
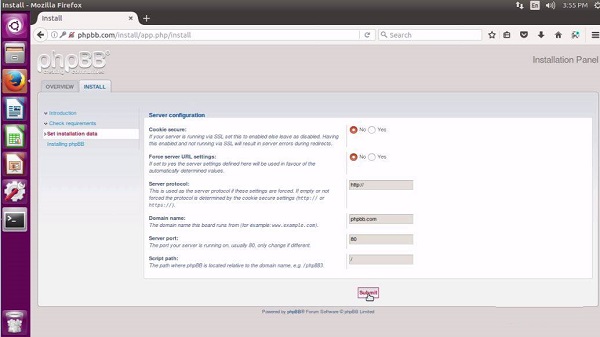
Fill server configuration details and click on Submit button.
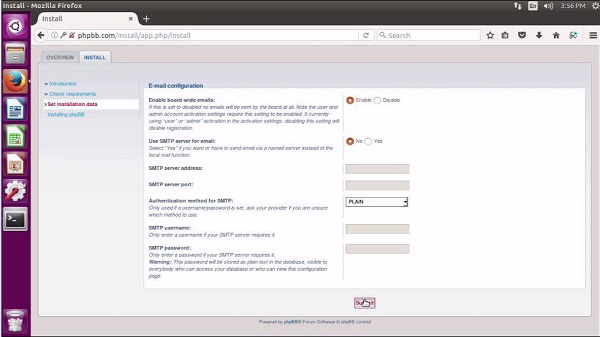
Fill the email configuration details and click on Submit button.
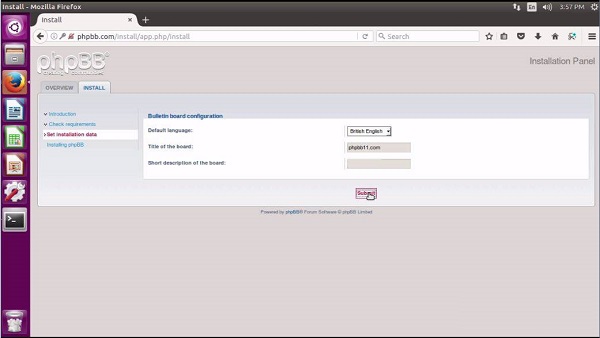
Finally enter the site details and click on Submit button.
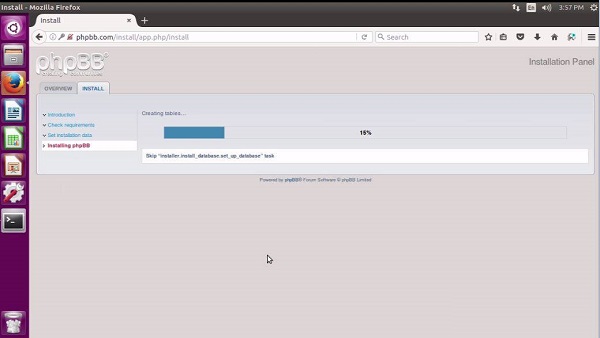
Now installation process will start and will take some time.
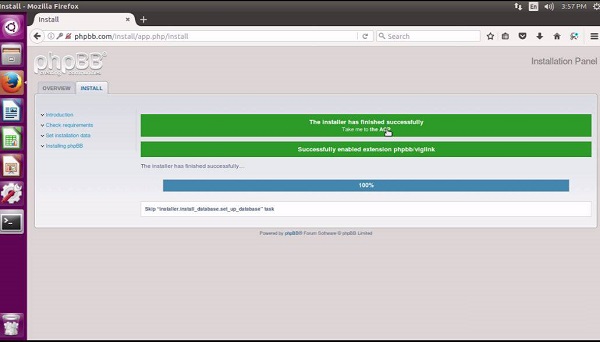
Installation is completed successfully now click on the Take me to the ACP button.
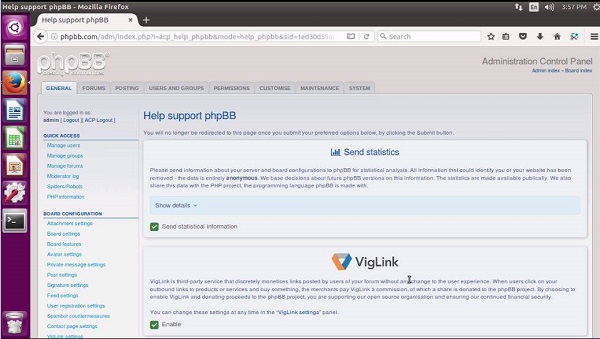
Next page will be admin page.
If you find this tutorial helpful please share with your friends to keep it alive. For more helpful topic browse my website www.looklinux.com. To become an author at LookLinux Submit Article. Stay connected to Facebook.
Leave a Comment